maart 06, 2016
Ethernet - a wired network connection
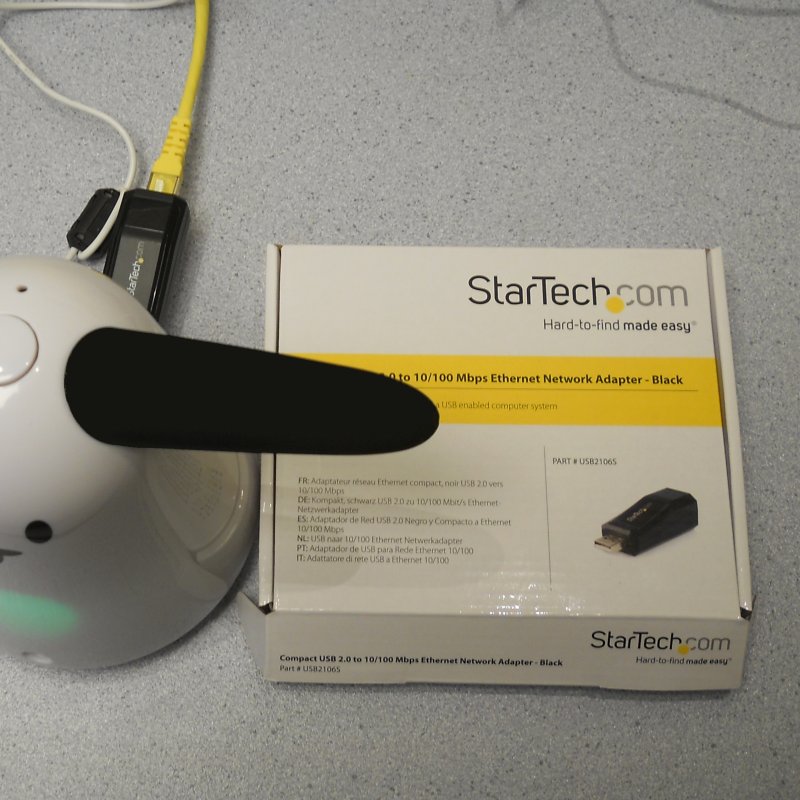
This week, I've ordered a USB network adapter for my Karotz. On the webshop Azerty.nl, they promised to deliver in a few days, and they did.
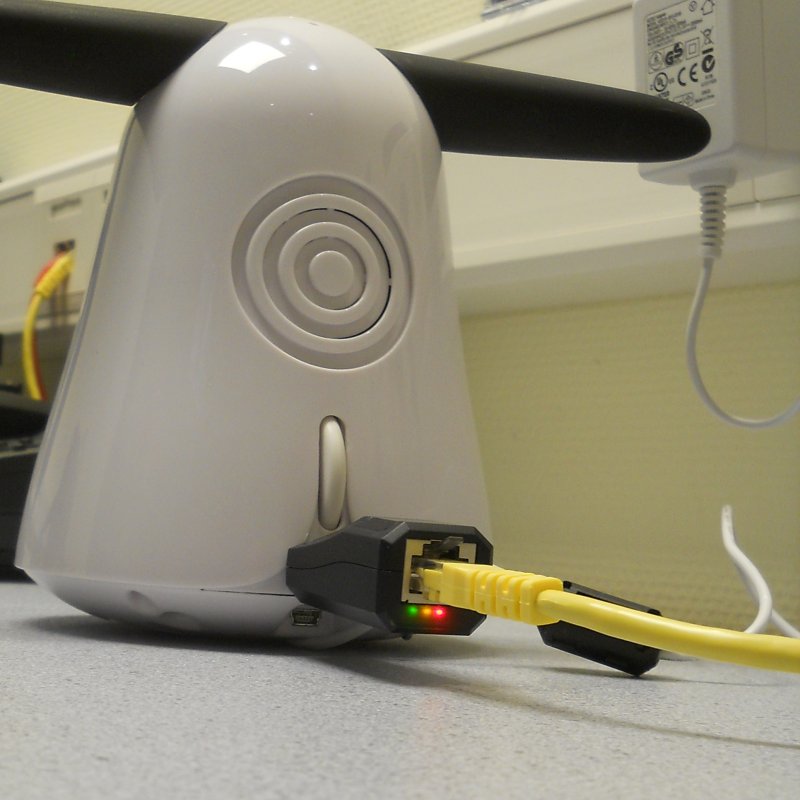
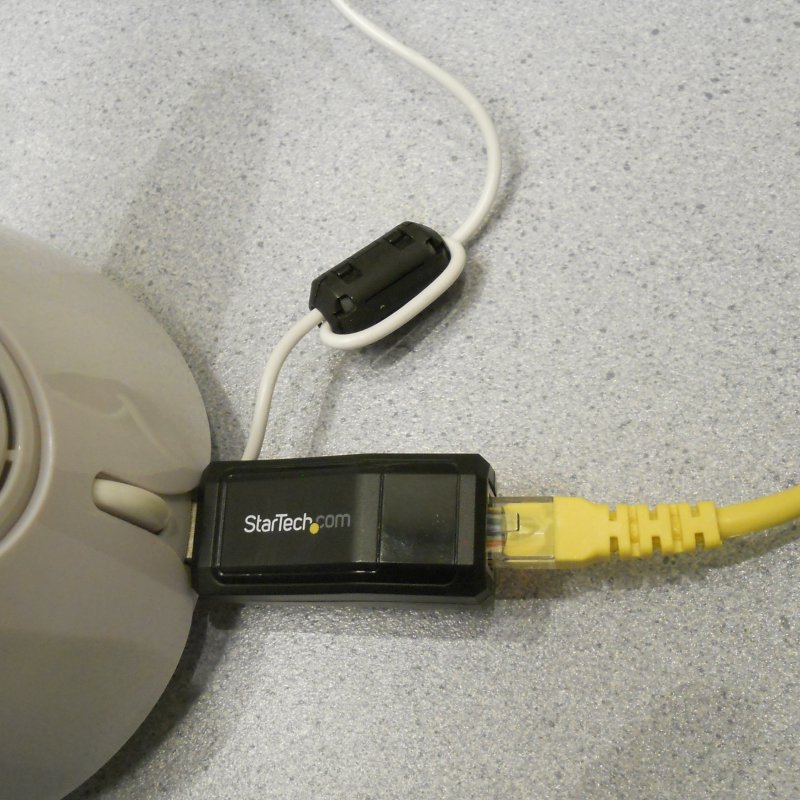
A Karotz needs a USB network adapter with the Moschip MCS783x chipset. So I choose the Startech USB2106S.
According to journaldulapin.com, you just have to copy and edit one config file to enable the network adapter. But I wanted to know what is happening behind the scenes.
In this article, I'll give you the commands to bring up your ethernet network without the use of the configuration files of your Karotz.
First, boot without the adapter plugged in. Your Karotz is now connected by WIFI. After startup, insert the USB network adapter into the USB port of your Karotz. Use Telnet to login, and enter command "dmesg".
At the end of dmesg, you'll see that your Karotz recognized the network adapter:
MOSCHIP usb-ethernet driver 1-1.2:1.0: usb_probe_interface - got id
usb 1-1.2: applying rev.C fixup
usb 1-1.2: applying rev.C fixup
usb 1-1.2: manual set_interface for iface 0, alt 0
eth0: register 'MOSCHIP usb-ethernet driver' at usb-s3c24xx-1.2, MOSCHIP 7830/77
30 usb-NET adapter, 00:13:3b:9b:2f:ca
drivers/usb/core/inode.c: creating file '004'
usb 1-1.2: New USB device found, idVendor=9710, idProduct=7830
usb 1-1.2: New USB device strings: Mfr=1, Product=2, SerialNumber=3
usb 1-1.2: Product: USB-MAC Controller
usb 1-1.2: Manufacturer: Moschip Semiconductor
usb 1-1.2: SerialNumber: 3b9b2fca
Enter command
You'll see your network adapters. Look for eth0, that is your wired network adapter. You'll see that is doesn't have an IP address assigned yet. It is now time to enable it. We need 4 commands to enable the eth0 interface.
First, we'll bring the interface up. Enter command:
Assign a static IP address using the following command (choose an IP address different from your WIFI adapter):
Add a route to your gateway. The gateway address is often the IP address of your router:
And finally, setup DNS to let your Karotz translate domain names into IP addresses. You can use the IP address of your router, or use Google's public DNS: 8.8.8.8. The DNS server is stored in a file on your Karotz: /etc/resolv.conf. Because you have access at the moment (using WIFI), this file allready exists. So you might want to skip this step.
Enter command "ifconfig" again:
Check if your eth0 interface has an IP address assigned. You should now be able to ping this address from another computer in your network.
At the moment, both interfaces (wlan0 and eth0) are up. So lets bring WIFI down using the following commands:
/bin/killall wpa_supplicant
/bin/ip addr flush dev wlan0
The first command will bring down your WIFI interface. It will take a few seconds before you'll get your bash prompt back. The second command will kill the wpa_supplicant application responsible for the WIFI connection and encryption.
After these two commands, you'll still have Telnet access. Lets remove the WIFI IP addres now using the last command. Your Telnet connection is lost now. Start a new Telnet session and connect to the eth0 IP address.
After a few seconds, you're logged in again, but now on the wired USB network adapter. Because of the three commands above, we lost routing. Enable routing again:
WIFI is completely disabled now, but only for this session. Check this by entering "ifconfig".
If you do a reboot, WIFI is back again. To enable WIFI in this session:
/sbin/ifconfig wlan0 up
# start wpa_supplicant
/usr/sbin/wpa_supplicant -iwlan0 -Dwext -B -c /etc/conf/wpa.conf
# setting static ip
/sbin/ifconfig wlan0 192.168.178.135 netmask 255.255.255.0
# adding route to gateway
/sbin/route add default gw 192.168.178.1
It is now easy to switch between WIFI and wired network using bash commands.
Hope you enjoyed this networking adventure!
Images